Arduino micro LED & Frankenlight
Notice
1) Email for EE47 staff : ee47-sum1415-staff@lists.stanford.edu.
Overview
For this assignment, you are going to 1) control an LED light with your own Arduino micro and 2) build your own stand-alone light by hacking apart an electronic device of your finding/choosing, figuring out what is going on inside, and hacking in an LED.
In The Report
Include your responses to all of the green questions in your lab report. Show your calculations. Please follow the Lab Report Guidelines. Please upload as 'wiki' page instead of documents.
Also include any schematics, photos, or video of you using your Frankenlight.
Datasheets You May Find Useful
Red LED, Yellow LED, Green LED, White Superbright LED (also, if you're curious, RGB LED)
6mm Pushbutton, 12mm Pushbutton
Arduino Micro Development Board introduction
Arduino Micro Schematic
Part A. Assemble Kits
You're a customer of the EE 47 Parts Buffet! Grab a cardboard box and take parts for your kit. Take only the amount requested for each part. We'll hand out the fancier parts before each of the later labs.
You will need:
- Breadboard
- Arduino Micro
- USB cable
- 2 LEDs of each color (red, green, yellow)
- Superbright LED (clear, with 2 leads)
- RGB LED (clear, with 4 leads)
- 1 Large Button
- 2 Small Buttons
- 2 Potentiometers
You might also want to grab one or two resistors so you can continue prototyping at home. (think: what values are useful for 1.8V and 3.2V LEDs).
Part B. Arduino micro LED!
For the remaining labs and class project, we'll be using the Arduino Micro development board as our hardware platform. This board is compatible with the Arduino prototyping platform. As a platform, Arduino comprises both hardware and software. So we'll be using the the Arduino hardware and software environment (a type of Integrated Development Environment, or IDE).
If you'd like to use your own laptop computer for programming Arduino Micro, now is a good time to download and install the software on your machine. On the lab machines, you can find it at C:\Users\Public\Documents\arduino-1.0.4-windows, and make a shortcut on desktop for yourself.
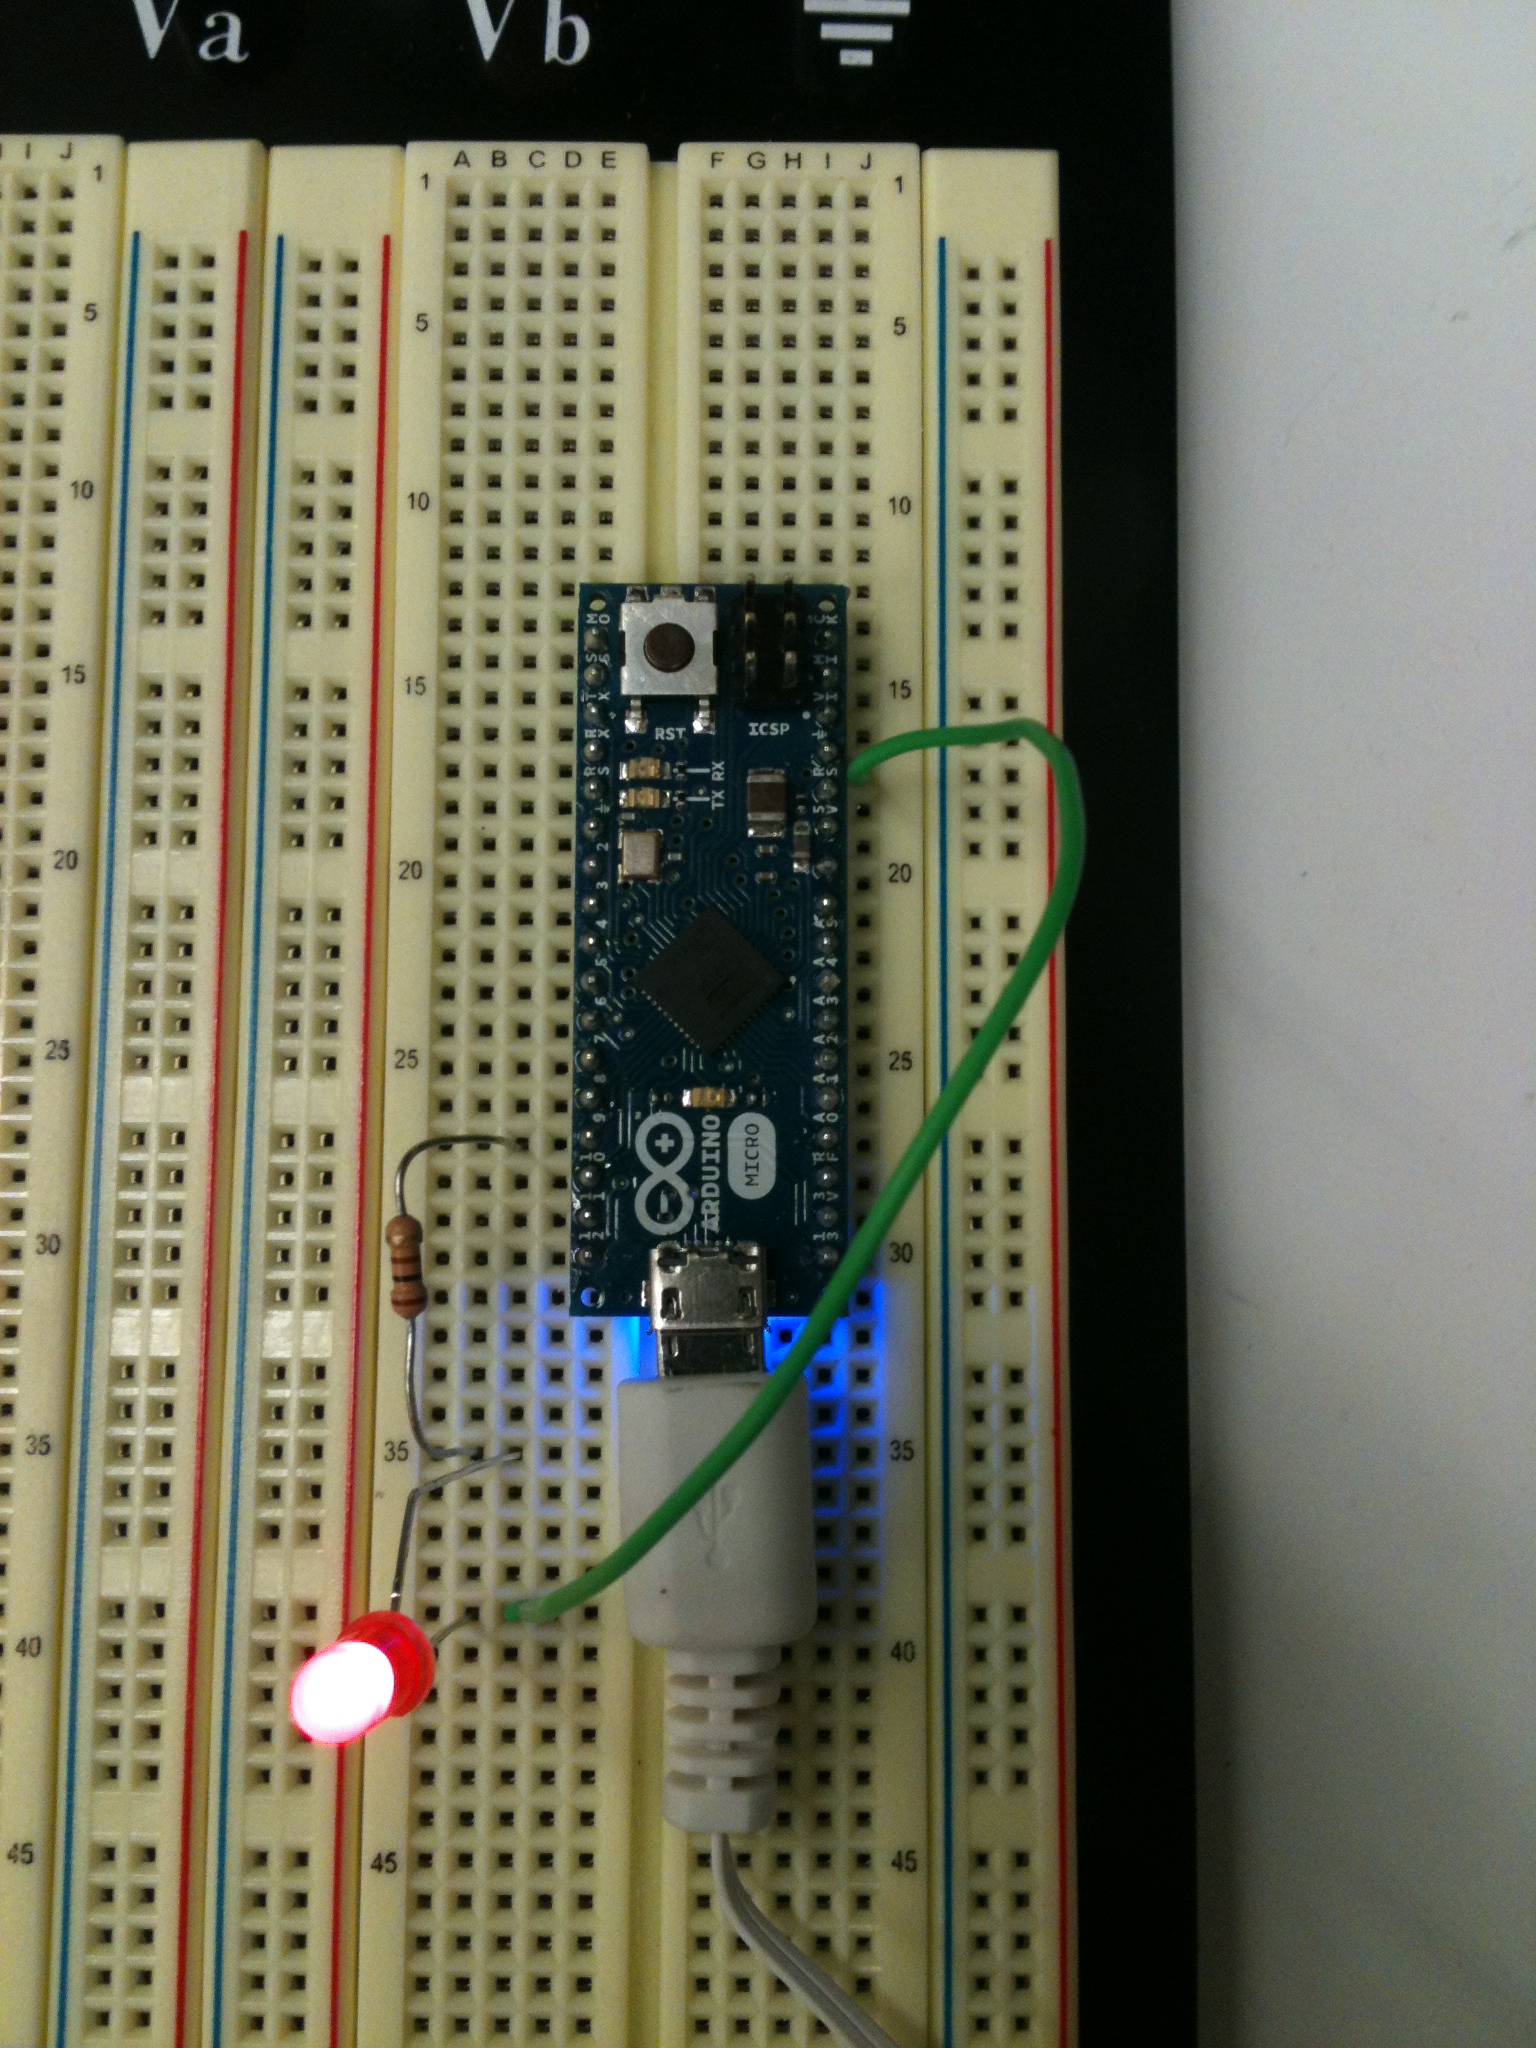
1. Blinking LEDs with Arduino Micro
Connect the Arduino Micro to your computer using the USB cable. The Arduino Micro board comes preloaded with a version of the Blink program on it, so its LED should start blinking as soon as the USB cable starts powering the board. This LED is hardwired to pin 13 of Arduino Micro. The pinout diagram of Arduino Micro can be found here.
The Blink program itself can be found in the Arduino IDE's example code folder under File->Examples->Basics->Blink. Check it out!
a. What line(s) of code do you need to change to make the LED blink (like, at all)?
b. What line(s) of code do you need to change to change the rate of blinking?
c. What circuit element would you want to add to protect the board and LED?
To compile and upload your code, take the following steps (note that 1, 2 should only have to be done once):
1) In the Arduino program, select the board we are using: Tools -> Board -> Arduino Micro
2) You may also have to select a communications (or COM) port (Tools -> Serial Port). Ask an instructor to help you choose the right port.
3) To compile your code, click on the "checkmark" on the upper far left of the Arduino development window.
4) To upload compiled code to Arduino Micro board, click on "right arrow" besides "checkmark".
5) When the code is uploaded, the Arduino Micro should automatically start running your new code.
Now modify the circuit and program so that you can blink an external LED on pin 9. Don't forget about question (c) above! (Also, don't forget to power and ground the power and ground rails of your breadboard, respectively!)
Some tips and reminders:
We don't have extra Arduino Micro boards, so be careful.
Remember that the USB connected to the Arduino Micro boards supplies power.
Check that there are no shorts between power and ground before you plug in the USB cable (and apply power).
Unplug power before modifying circuits!

2. Toggle LEDs on and off using Arduino Micro
With your LED still connected on digital pin 9, hook up a button circuit on digital pin 2, so that the pushbutton attaches from pin 2 to ground, and so that there is a 10K resistor attached between pin 2 and Vcc. (Vcc is the supply voltage. In this case, it is 5 V. You can check out your Arduino Micro pinout diagram in your kit if you're still confused).
Use either the same circuit you used for the previous part for the LED or the alternative design below. The alternate circuit causes the "on" state of the LED to occur when Arduino Micro pin = LOW, not HIGH, as before.


The Arduino Micro pin configured as an input has a 'high input impedance.' This means that it can sense the voltage without affecting the circuit, like a probe.
Use the Button program (File->Examples->Digital->Button) to make your Arduino Micro into a light switch.
a. Which lines do you need to modify to correspond with your button and LED pins?
b. Modify the code or the circuit so that the LED lights only while the button is depressed. Include your code in your lab write-up.
3. Fading LEDs on and off using Arduino Micro
What about those "breathing" LEDs on Macs? The fading from bright to dim and back is done using pulse-width modulation (PWM). In essence, the LED is toggled on and off very rapidly, say 1,000 times a second, faster than your eye can follow. The percentage of time the LED is on (the duty) controls the perceived brightness. To control an LED using PWM, you'll have to connect it to one of the pins that support PWM output—which are 4, 5, 6, 9, 10, 11, 12 on the Arduino Micro.
Use the Fading program (File->Examples->Analog->Fading) to make your LED fade in and out.
a) Which line(s) of code do you need to modify to correspond with your LED pin?
b) How would you change the rate of fading?
c) (Extra) Since the human eye doesn't see increases in brightness linearly and the diode brightness is also nonlinear with voltage, how could you change the code to make the light appear to fade linearly?
Part C. Frankenlight
Time to hack apart an existing electronic device! In Room 36 (one of Stanford's prototyping and modeling shops) you'll be able to hack apart most anything.
1. Super bright LEDs
We have included some nifty superbright LEDs in your kit. They are clear and have two leads. The link to their datasheet is here. They have ~3.2V forward drop, and a max current rating of 30mA.
a. What is the minimum resistor size that should be used with these LEDs? (Hint: think about your voltage supply and what the diode voltage drop means.)
Try prototyping a circuit with the superbrights. (Be careful! They are bright enough that it hurts your eyes to look at them!)
2. Take apart your electronic device, and draw a schematic of what is inside.
a. Is there computation in your device? Where is it? What do you think is happening inside the "computer?"
b. Are there sensors on your device? How do they work? How is the sensed information conveyed to other portions of the device?
c. How is the device powered? Is there any transformation or regulation of the power? How is that done? What voltages are used throughout the system?
d. Is information stored in your device? Where? How?
3. Using your schematic, figure out where a good point would be to hijack your device and implant an LED.
(or, if the thing you are hacking is an LED light, hijack it so that you can turn the light on and off)-- be creative.
4. Build your light!
We have scrap perfboards in the lab, which provide a handy way to connect your parts. (These are what we used during the soldering demo.) You may want to make your light using passive components (such as switches, resistors or potentiometers) rather than your microcontroller (also known as a μC), unless you think of a nice way to incorporate the μC into your design without soldering it inside of a light. (You'll need it back for future labs and projects!) If your design does require a μC, perhaps you can run a lead from your breadboard to the main light, although you'll lose portability that way. Clever use of components is encouraged!
Give yourself enough time to build your design. Consider re-visiting the lab outside of session, so you can access components, tools, soldering irons.
Please post a short video of your frankenlight to your lab report page. Include any schematics as well.
Important final note: The best Frankenlight design will win a $10 gift certificate at Sparkfun. Sweet!
Typical max Continuous DC Forward Current ratings for a red LED are 30mA.
What resistance value does this correspond with?
Is that a maximum or minimum resistance?
Comments (0)
You don't have permission to comment on this page.